How to Replace a Thermal Printhead on IBM SureMark, Toshiba TCx and 6145 Receipt Printers
A field-tested, step-by-step thermal printhead replacement walkthrough for IBM 4610, Toshiba SureMark and TCx 6145 receipt printers — with ESD safety, cable orientation, and post-install verification.
How to confirm the printhead is the failure
Roughly two-thirds of "the printer doesn't work" tickets routed to a parts supplier turn out to be something else — empty paper sensor, dirty platen roller, cable knocked loose during a till move, or simply a configuration drift after a firmware push. Replacing a healthy printhead is an expensive way to discover that. Run the four checks below first.
- Print self-test. Power-cycle the printer holding the FEED button (IBM 4610) or the SETUP button (Toshiba 6145) to print a configuration receipt. If the self-test prints cleanly, the head is fine — the fault is upstream (driver, USB cable, host application).
- Inspect the receipt for the failure pattern. A single hairline white line through every character, in the same position on every receipt, is the diagnostic signature of a dead heater element — that head needs to be replaced. Faded prints, random missing dots that move position, or smudges almost always come from buildup and clean off with isopropyl alcohol.
- Check paper quality. Substituting a roll of known-good 80 mm thermal paper restores image quality on a surprising fraction of "dead head" callouts.
- Reseat the printhead flex cable. Vibration loosens the FFC connector. Power off, unlatch, reseat fully and re-latch — many "intermittent printing" tickets end here.
Tools and parts you will need
| Required | Recommended | |
|---|---|---|
| Phillips #1 screwdriver | ✓ | |
| ESD wrist strap with grounding cable | ✓ | |
| 99% (anhydrous) isopropyl alcohol | ✓ | |
| Lint-free swabs / microfibre cloth | ✓ | |
| Replacement printhead (correct OEM part number) | ✓ | |
| Magnifier loupe (10× or better) | ✓ | |
| Anti-static mat under work surface | ✓ | |
| Compressed air canister | ✓ |
Safety: ESD and power-down basics
A thermal printhead contains thousands of microscopic heating elements wired to a driver IC. A static discharge from your fingertip — easily 5,000 V or more on a dry day — is enough to vaporise individual elements, leaving you with a permanent missing-dot pattern that the printer's self-test cleanly identifies as your fault.
Industry guidance (the ESD Association's S20.20 standard, referenced in the sources below) is the formal version of these rules; the field shorthand is "treat it like a motherboard CPU".
Replacement procedure (step-by-step)
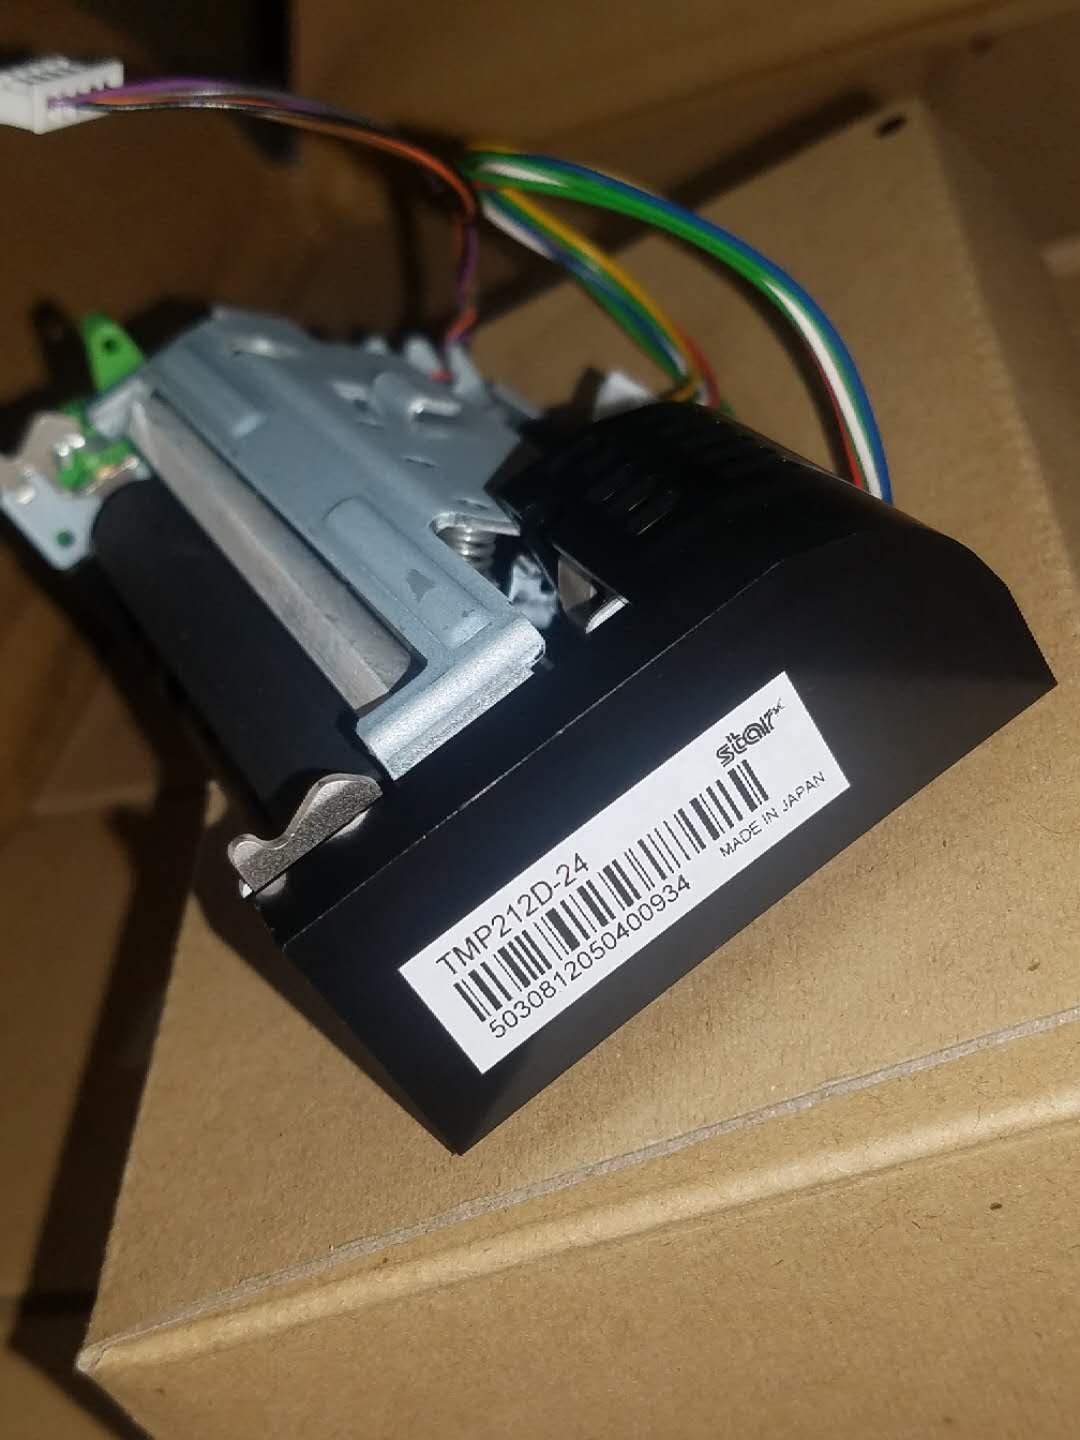
The procedure below covers the IBM 4610-1NR / 2NR family, the SureMark / TCx 4610 series, and the Toshiba 6145 family. Other thermal POS printers (Epson TM-T88VII, Star TSP143IV, Bixolon SRP-350) follow the same pattern with minor cosmetic differences.
- 1
Power down and unplug
Power off the printer with its switch, then unplug both the AC cord at the wall and the USB / serial / Ethernet cable from the host. Wait 30 seconds for the internal capacitors to discharge before opening the cover.Caution: Skipping the host-cable unplug leaves USB power on the logic board. - 2
Open the printer and remove the paper roll
Open the receipt-cover latch and remove the paper roll. On the 4610 / SureMark, also lift the secondary cover that exposes the print mechanism. Set the paper aside out of dust. - 3
Free the printhead carrier
Locate the printhead carrier — it sits on a hinge above the platen roller, held by a spring-loaded clip on the SureMark family or a single Phillips screw on the 6145. Release the clip / remove the screw and tilt the carrier up to its service position.Caution: Do not pull on the flex cable while tilting — it will partially unseat and become hard to fully re-latch later. - 4
Disconnect the printhead flex cable
Most heads use a zero-insertion-force (ZIF) connector with a small black or brown latch that flips up. Flip the latch up, then slide the FFC ribbon cable straight out — never pull at an angle. Note the orientation (typically the blue stiffener faces up). - 5
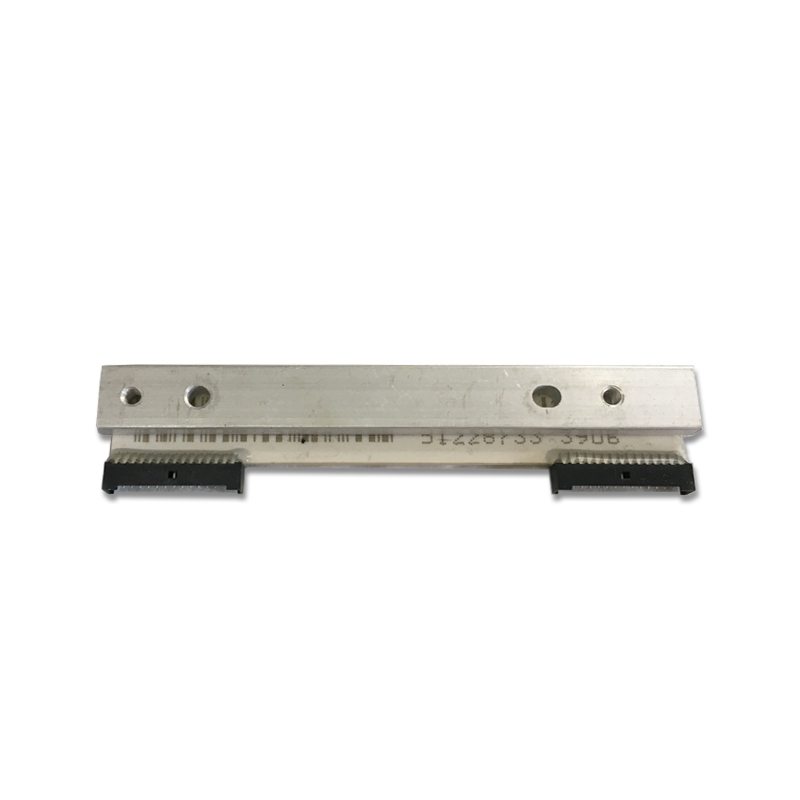
Remove the worn printhead
Lift the head straight up and out of its carrier. Inspect the platen roller underneath while you have access — if it has a glazed shiny stripe down its centre or visible deposits, clean it with the same alcohol swabs you'll use on the new head. - 6
Inspect and clean the seat
Wipe the printhead seat clean of paper dust and adhesive residue with a swab dipped in 99% isopropyl alcohol. Allow to dry fully (10–15 seconds). Confirm no fibres or grit remain — anything trapped between the new head and the carrier prints as a fixed defect. - 7
Install the new printhead
Hold the new head by its plastic carrier. Drop it into position, ensuring the alignment pins (usually two small posts in the carrier) seat fully. The head should sit flat — no rocking, no gap on either side.Caution: Confirm the new head's resistance value (printed on its label) matches the original within ±5%. A mismatch will print but burn out fast. - 8
Reconnect the flex cable
Slide the FFC straight into the ZIF socket as far as it will go, with the same orientation you removed (stiffener typically up). Press the latch back down until it clicks. A partially seated FFC will print but produce intermittent vertical stripes. - 9
Close the carrier, refit cables, power on
Lower the printhead carrier and re-secure its clip / screw. Refit the paper roll, close the cover, plug the host cable in, then plug AC last. Power on and go directly to the self-test.
Post-install verification
Don't ship the printer back to the customer without running the verification battery below — it takes two minutes and catches the small fraction of installs that have a subtle issue (mis-seated FFC, head resistance drift, missed alignment pin).
- Print the configuration self-test. Power-cycle while holding FEED (4610) or SETUP (6145). The self-test exercises every column on the head — confirm no missing dots, vertical stripes or density gradients.
- Print 30 receipts at maximum density. Send a longer, character-dense test page 30 times. Density should be uniform from receipt 1 to receipt 30. Drift indicates a thermal-soak problem (usually undersized power supply, not the new head).
- Stress test feed. Print a long graphic (a logo or a barcode) and confirm vertical lines stay vertical. Feed-roller misalignment shows up here, not in text-only prints.
- Confirm cutter (if present). Cut 10 receipts in a row. Cutter jams after a printhead swap usually trace back to a flex cable that's pinched against the cutter mechanism — go back and re-route it.
Why printheads fail early — and how to extend life
A genuine OEM thermal printhead in a typical retail environment is rated for around 50–150 km of paper feed (roughly 100–300 receipt rolls), or 18–36 months. The variation comes almost entirely from three controllable factors:
- Paper quality. Off-spec thermal paper has uneven coatings and embedded grit (silica, calcium carbonate fillers). Each receipt drags those abrasives across the printhead's protective glaze. Once the glaze is breached, heater elements oxidise and fail.
- Cleaning hygiene. Paper dust, adhesive residue from labels, and condensed moisture build up on the head. Cleaning with 99% isopropyl alcohol every 2 weeks (heavy retail) to monthly (light office) doubles or triples service life.
- ESD events. Dry winter air, polyester uniforms and untreated carpet create surprise discharges every time a customer hands over a card. Static dissipative mat under the printer + grounded chassis = problem solved.
For the full maintenance playbook covering cleaning frequency, solvent choice and the early-warning signs of wear, see the dedicated Extend Thermal Printhead Life guide in this series.
Compatibility matrix: 4610 vs 6145 vs SureMark vs TCx
One of the most common ordering errors is treating the IBM 4610 and Toshiba 6145 families as fully interchangeable — they share a lot of design DNA but the printheads and the firmware energy curves are model-specific. The table below summarises the mapping our service desk uses.
| IBM 4610 1NR/2NR | Toshiba 6145 1NR/2NR | TCx 300 / 700 | |
|---|---|---|---|
| Print width | 80 mm | 80 mm (compat. 58 mm) | 80 mm (compat. 58 mm) |
| Print density (dpi) | 203 | 203 | 203 |
| Print speed (mm/s) | ~125 | Up to 350 | Up to 350 |
| Printhead interchange | — | Drop-in replacement | Drop-in replacement |
| Recommended OEM resistance (Ω) | ≈ 750 | ≈ 950 | ≈ 950 |
| Self-test trigger | Hold FEED on power-up | Hold SETUP on power-up | Hold SETUP on power-up |
IBM withdrew the 4610 family from sale around 2020; Toshiba's 6145 series is the official successor, and most service centres now stock the 6145 head as a drop-in replacement for the 4610-2NR/2CR. Confirm with the OEM part number before ordering.
Frequently Asked Questions
How long should an IBM 4610 or Toshiba 6145 printhead last?
Can I use third-party (aftermarket) printheads safely?
Why do receipts have a vertical white stripe down the page?
Do I need to recalibrate the printer after swapping the head?
Can I just clean the printhead instead of replacing it?
Is it safe to power on the printer with the head cable disconnected?
Sources & further reading
- SureMark 4610 Printers Hardware Service Guide — Toshiba Global Commerce Solutions (PDF)
- TCx® 300 & SurePOS 300 Support — Toshiba Commerce
- IBM 4610 SureMark printer family — Wikipedia — Wikipedia
- Printhead Maintenance Guide — Zebra Technologies (PDF)
- ESD-S20.20 — Standard for the Development of an Electrostatic Discharge Control Program — ESD Association
- IBM SurePOS 700 Series Hardware Service Manual — ManualsLib
Related guides
Cash Drawer Wiring & Connection: RJ11/RJ12 Drawer-Kick, Printer-Driven vs USB, and the 12–24V Pulse
A POS cash drawer doesn't plug into the till — it's kicked open by a 12–24V pulse from the receipt printer down an RJ11/RJ12 cable. Get the interface, pins and voltage right and it just works. Here's the wiring, explained.
Read guide →Noisy or Failing POS Cooling Fan? Diagnose the Bearing, Clean It, and Match a Replacement
A grinding or whining POS fan is usually dust or a worn bearing — and ignored, it leads to overheating and shutdowns. Here's how to find the noisy fan, decide clean-or-replace, and match the right fan.
Read guide →Receipt Printing Faint, Dark, Partial or Streaked? Thermal Print-Quality Troubleshooting (Start With the Self-Test)
Faint, streaked or one-sided receipts almost always trace to a dirty head, the wrong paper, or a density setting — not a dead printer. One self-test print tells you whether the fix is software or hardware. Here's the full routine.
Read guide →Related categories
Featured parts in this guide
Need the parts mentioned in this guide?
Genuine OEM and quality-tested aftermarket parts for IBM, Toshiba, NCR, Diebold, Wincor and Hyosung systems — with worldwide shipping.