Guía de compra de cajón portamonedas POS: con impresora vs USB vs manual, cables RJ11/RJ12 y tamaño
Cómo elegir un cajón portamonedas POS — accionado por impresora (kick RJ11/RJ12) vs USB directo vs manual, por qué importan los cables POS, dimensionar el diseño de billetes y monedas, calidad de fabricación, y emparejarlo con tu impresora de recibos.
El selector rápido
A cash drawer is the simplest part of a POS lane — and the one people most often buy wrong. Get three things right and it just works: the connection type, the cable, and the size. Quick orientation:
| If your setup is… | Choose | Why | |
|---|---|---|---|
| A fixed till with a receipt printer | Printer-driven (RJ11/RJ12) | Opens on the printer's 24V kick — simplest, most common | — |
| Tablet POS / no kick-capable printer | USB direct-connect | Opens via driver/POS software | — |
| Back-up / low-tech counter | Manual push-open | No electronics; open by key or button | — |
Tipos de conexión comparados
The three ways a drawer connects, side by side:
| Printer-driven | USB direct | Manual | |
|---|---|---|---|
| Connects to | Receipt printer's kick port | POS PC / tablet host | Nothing (standalone) |
| Opens via | 24V kick when receipt prints | Driver / POS software | Key or push-button |
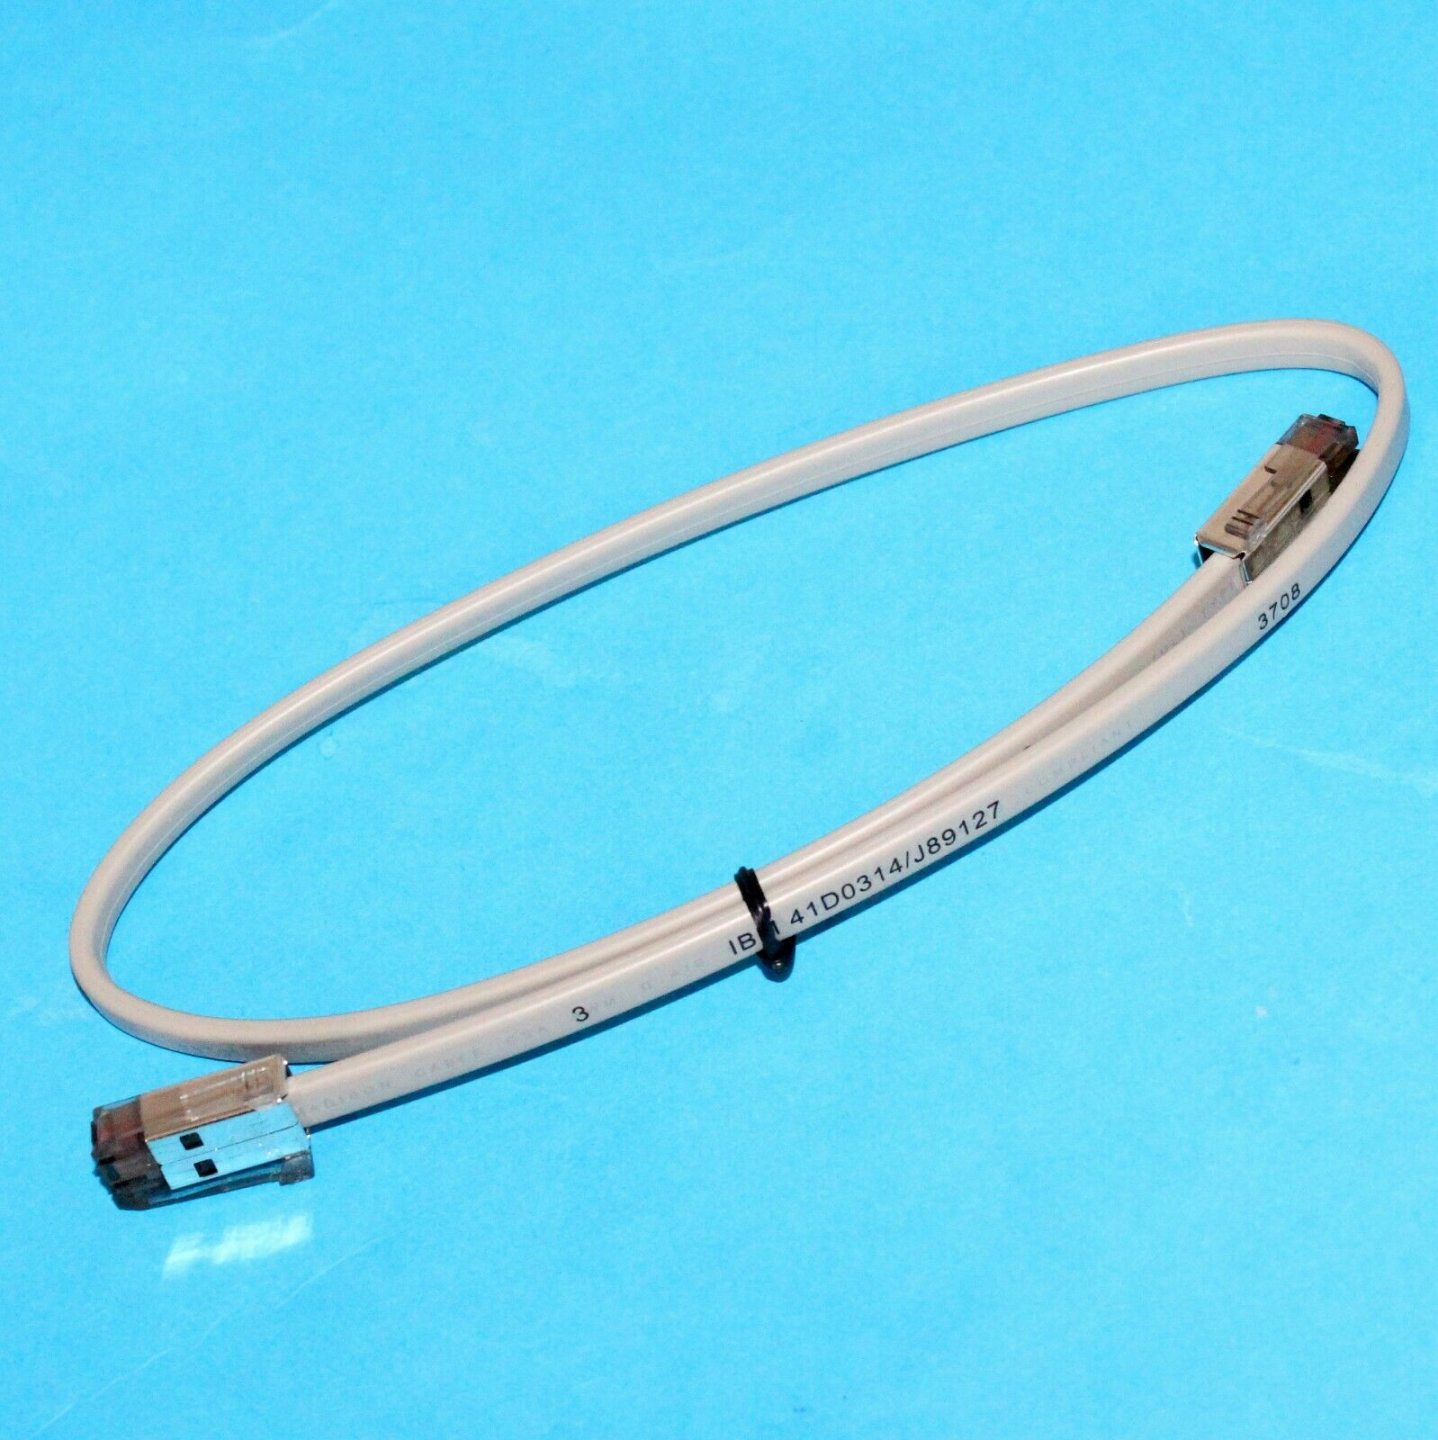
| Cable | RJ11 (6P4C) / RJ12 (6P6C) | USB | — |
| Best for | Fixed tills with a printer | Tablet/cloud POS | Backup or manual lanes |
| Watch out for | Cable pinout & 12V vs 24V | Driver/utility setup | No transaction-linked open |
Cómo funciona el 'kick' accionado por impresora
The printer-driven setup is worth understanding because it’s the one most tills use and the one most setup errors come from. The receipt printer has a drawer-kickport; at the end of a sale it fires a ~24VDC pulse down the RJ11/RJ12 cable, energising the drawer’s solenoid, which releases the latch and a spring pops the drawer open.
Two things must agree for this to work: the cable’s pinout (POS-grade, not a phone cable) and the drawer’s voltage (most are 24V, some 12V) versus what the printer kicks. Get either wrong and the drawer either won’t open or opens unreliably.
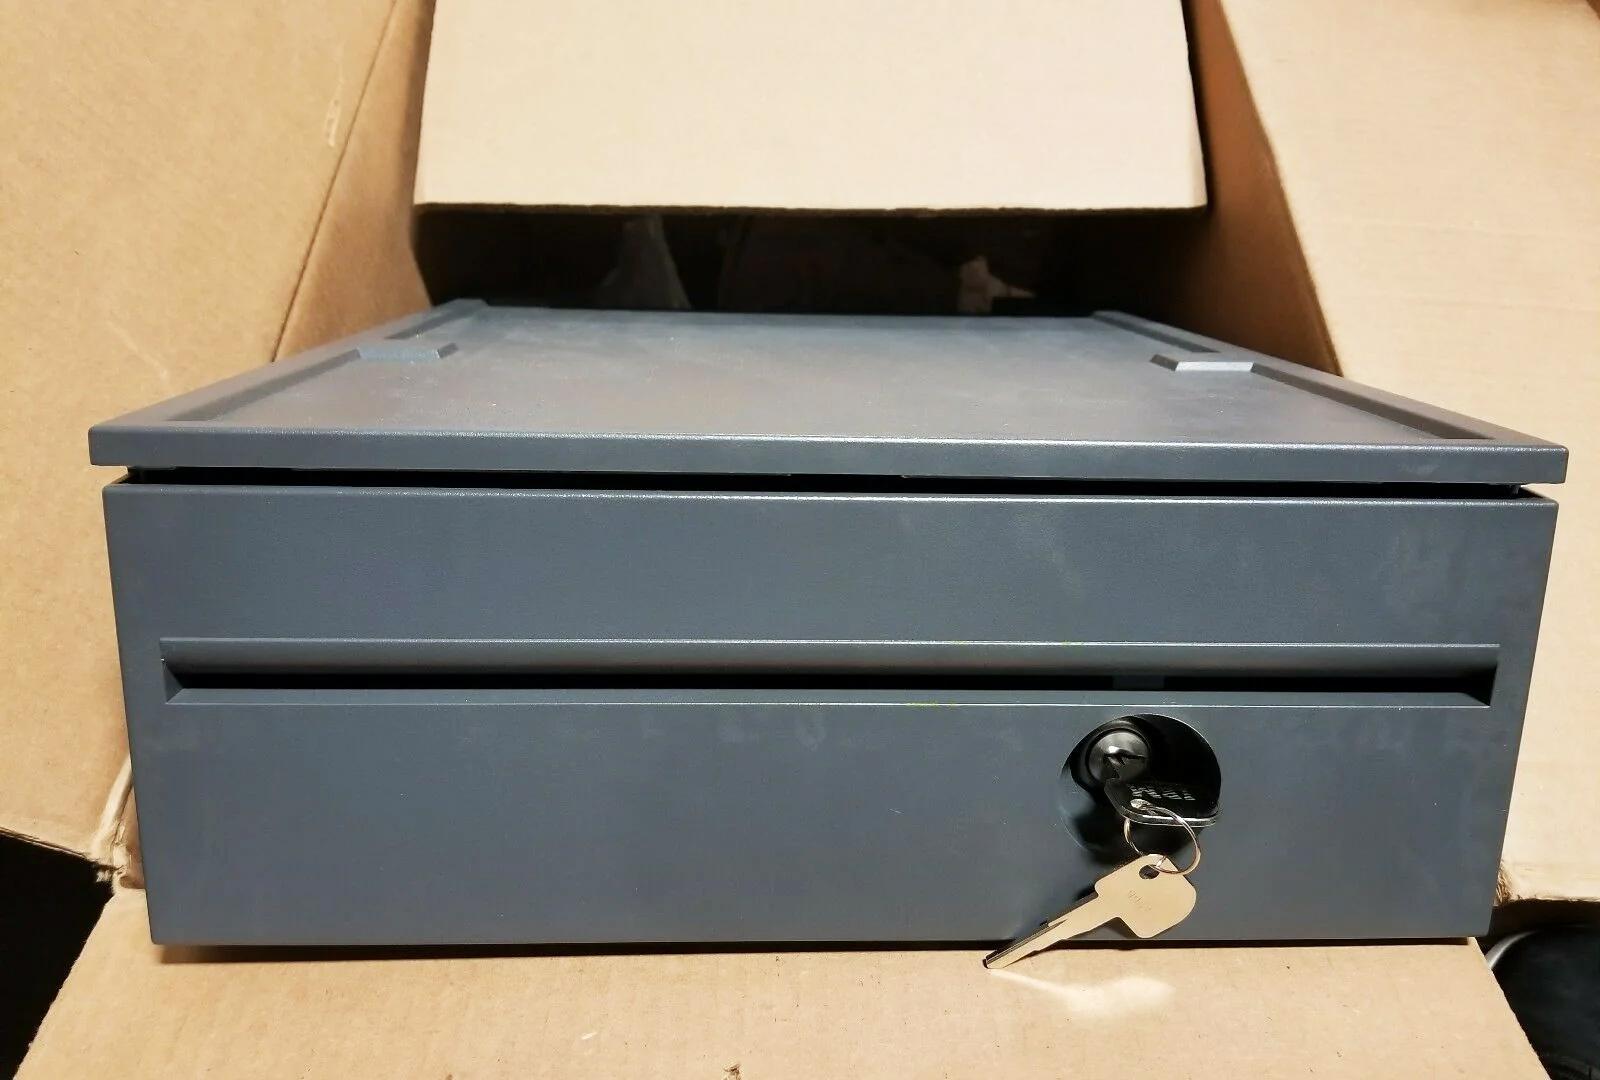
Tamaño y calidad de fabricación
Once the connection is settled, size and build decide whether the drawer survives daily abuse and fits your counter:
| Factor | What to choose | |
|---|---|---|
| Footprint | Compact ~13 in for tight/tablet counters; ~16 in standard for most retail | — |
| Bill compartments | 4–5 for most currencies; more for multi-denomination/currency | — |
| Coin cups | 5–8 removable cups; match your coin set | — |
| Construction | Steel front & frame; roller-bearing slide for smooth, durable opening | — |
| Lock | Multi-position (open / online / locked) for cash control | — |
| Media slot | Add one if you accept cheques or large notes under the till | — |
Elegir según la instalación
A short path from your setup to the right drawer:
- 1
Do you have a kick-capable receipt printer?
Most do — a drawer-kick (RJ11/RJ12) port. If yes, choose a printer-driven drawer. If your POS is tablet-based with no kick port, choose USB. - 2
Match the voltage
Confirm the printer kicks 24V (most common) or 12V, and pick a drawer rated for the same. Mismatched voltage opens unreliably or not at all. - 3
Size it
Pick the footprint that fits your counter and the bill/coin layout that matches your cash volume and currency. - 4
Pick the build and lock
Steel front, roller-bearing slide, and a multi-position lock for a busy till. Add a media slot if you take cheques or large notes.
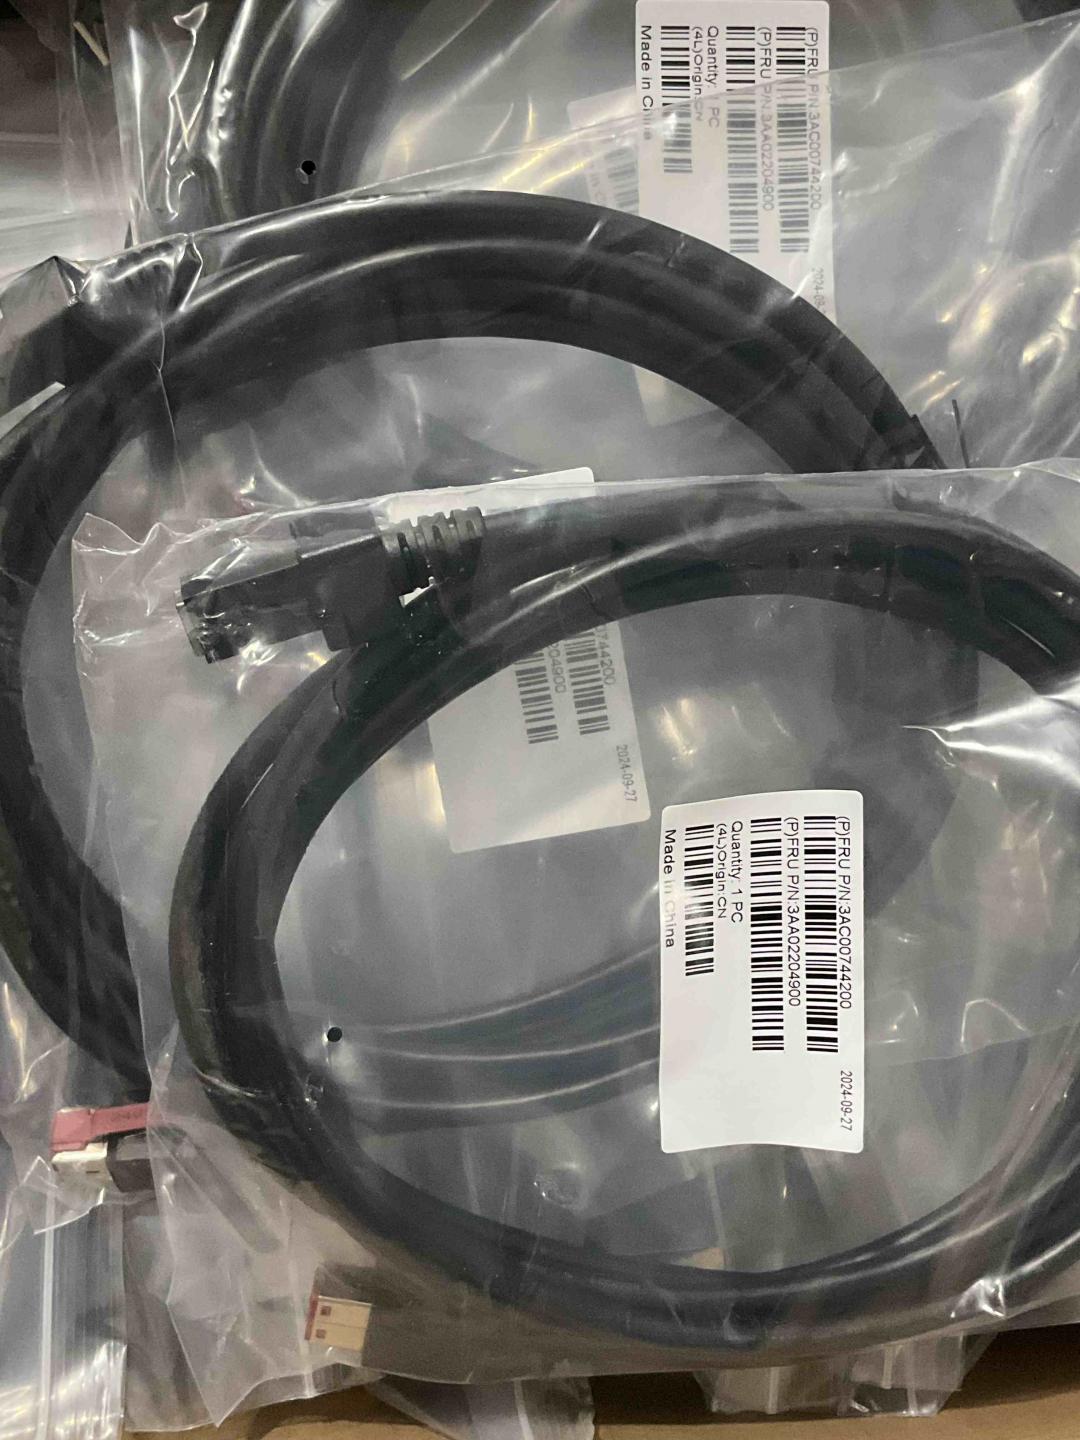
Cables, configuración y qué abastecer
To get it running and keep it running, order and check these:
| Item | Note | |
|---|---|---|
| Drawer-kick cable | POS-grade RJ11/RJ12 wired for your printer + drawer (not a phone cable) | — |
| Correct printer port | Plug into the drawer-kick port, not a phone/network jack | — |
| POS kick setting | Enable the drawer-kick in the printer/POS config; test with a no-sale open | — |
| Spare lock & keys | Keep spares; locks and keys are common loss items | — |
| Spare coin tray | Removable trays wear and crack — easy to replace | — |
Browse cash drawers and spares in our cash drawer & parts category, and drawer-kick cables in cables & connectors. If a correctly-bought drawer won’t open, our cash-drawer troubleshooting guide walks the full diagnosis, and the printer interface guide covers the printer side. Tell us your printer model and we’ll match a compatible drawer and cable before you order.
Preguntas frecuentes
¿Qué diferencia hay entre un cajón accionado por impresora y uno USB?
¿Puedo usar un cable de teléfono/Ethernet normal para el cajón?
¿Cualquier cajón funcionará con mi impresora de recibos?
¿Qué tamaño de cajón necesito?
¿Qué buscar en calidad de fabricación?
Mi cajón no abre — ¿es el cajón o la instalación?
Fuentes y lecturas complementarias
Guías relacionadas
Terminales POS todo-en-uno vs modulares: cuál comprar (y cómo afecta cada uno las reparaciones)
El todo-en-uno es ordenado y rápido de desplegar; el modular es flexible y más barato de actualizar y reparar. La respuesta correcta depende de tu tamaño, planes de crecimiento — y cómo quieres manejar los fallos.
Leer guía →Guía de compra de lectores de código de barras: láser 1D vs imager 2D, con cable vs inalámbrico, de mano vs manos libres
Dos preguntas deciden la mayor parte: ¿necesitas escanear pantallas de móvil (entonces 2D), y tu mostrador está lo bastante ocupado para querer manos libres? Aquí está cómo tecnología, formato y conexión se ajustan al uso real.
Leer guía →Cortadores automáticos de impresora de recibos: guillotina vs rotativo, corte parcial vs total, y vida de la cuchilla
¿Guillotina o rotativo? ¿Corte parcial o total? El cortador es la pieza móvil más usada de una impresora de recibos — el tipo y modo correctos mantienen la caja rápida y los recibos ordenados.
Leer guía →Categorías relacionadas
Repuestos destacados
¿Necesita las piezas mencionadas en esta guía?
Piezas OEM originales y alternativas probadas en fábrica para sistemas IBM, Toshiba, NCR, Diebold, Wincor y Hyosung — con envío mundial.